Weapons
Targeting and fire control
Choose the right rack, line up a target, and spend each firing window well.
What you do
Section titled “What you do”Weapons turns a firing opportunity into useful damage. Choose a target, select an installed weapon rack, and use the tactical display to aim. Different racks handle shields, exposed hull, moving targets, groups, and close threats in different ways.
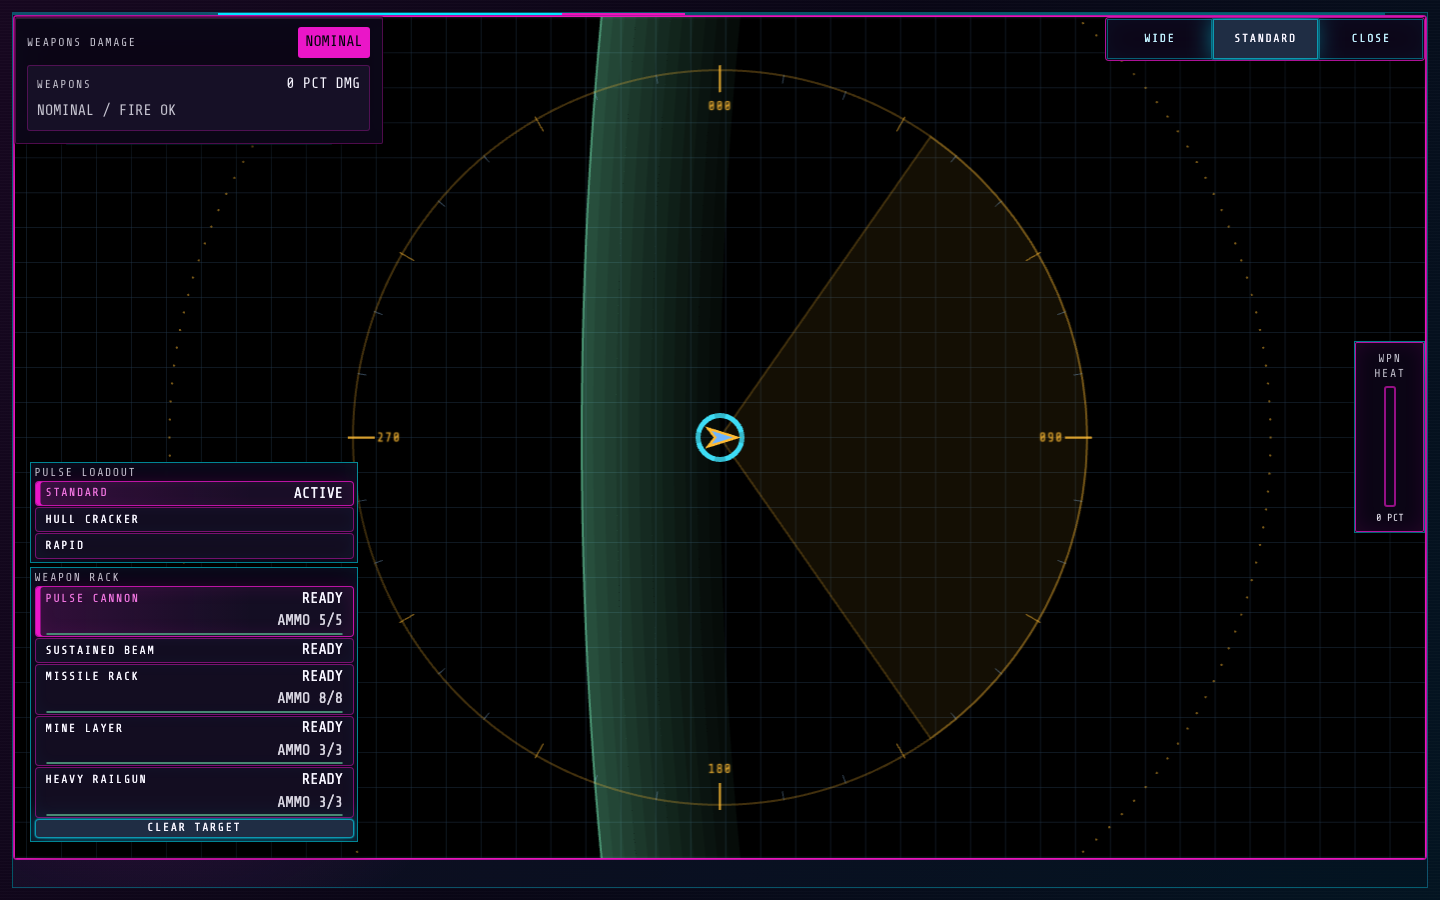
- The tactical display is where you select contacts and place aimed shots.
- The rack shows installed weapons, loadouts, and ammunition; heat is at the right edge.
How to control it
Section titled “How to control it”- Select an enemy on the tactical display, then choose a rack from the weapon list or its number key. Clear the current target when you need a different lock.
- Use the rack’s on-screen controls to charge, fire, or choose a loadout. Pulse, missile, and mine loadouts reuse Q/W/E within their own rack, so first check which rack is selected.
- Aim a missile or mine placement on the tactical display. Mines deploy in a short aft arc and need time to arm.
| Action | Default key |
|---|---|
| Select pulse cannon | 1 |
| Select sustained beam | 2 |
| Select missile rack | 3 |
| Select mine layer | 4 |
| Select heavy railgun | 5 |
| Select repulsor burst | 6 |
| Pulse loadout standard | Q |
| Pulse loadout hull cracker | W |
| Pulse loadout rapid | E |
| Missile loadout standard | Q |
| Missile loadout tracking | W |
| Missile loadout heavy | E |
| Mine loadout breacher | Q |
| Mine loadout blast field | W |
| Mine loadout disruptor | E |
| Clear target | C |
Key systems
Section titled “Key systems”Weapons have firing arcs, travel time, heat, reloads, and finite ammunition. A selected rack may still be unable to fire because the target is out of arc, the weapon is not ready, or the needed ammo is empty. The rack display and target state are the fastest places to diagnose a missed window.
Upgrades
Section titled “Upgrades”Pulse Cannon Rack
400 creditsInstalls the pulse cannon rack and its charge-and-fire controls.
Use it: Watch heat and firing windows while using the cannon against targets in arc.
Sustained Beam Rack
1,850 creditsInstalls a beam rack that maintains pressure while its contact can be sustained.
Use it: Hold the target in the firing arc and watch heat during long contact.
Missile Rack
2,800 creditsInstalls guided missile controls and storage; purchasing the rack also unlocks standard missiles.
Use it: Check remaining missiles and the selected loadout before launching.
Mine Layer
3,100 creditsInstalls an aft mine launcher; purchasing the rack also unlocks breacher mines.
Use it: Place mines behind the ship to cover a retreat or deny a pursuing lane.
Heavy Railgun
5,600 creditsInstalls a heavy precision weapon built for armor-breaking shots.
Use it: Wait for a clean firing line and account for its charge before firing.
Repulsor Burst
2,400 creditsInstalls a close-range burst that pushes nearby enemy ships away.
Use it: Trigger it when a hostile closes in; range matters more than a distant lock.
Standard Pulse Loadout
300 creditsAdds the standard pulse ammunition profile for dependable shield and hull damage.
Use it: Use this as the general-purpose pulse loadout.
Requires Pulse Cannon Rack
Hull Cracker Pulse
700 creditsAdds limited pulse ammunition tuned for exposed hulls.
Use it: Switch after shields are down to spend its limited shots where they matter.
Requires Pulse Cannon Rack
Rapid Pulse Loadout
700 creditsAdds a faster-firing pulse profile for close pressure.
Use it: Track heat and ammo consumption during rapid bursts.
Requires Pulse Cannon Rack
Standard Missiles
100 creditsAdds a dependable standard missile profile to the missile rack.
Use it: Choose it when a specialized tracking or heavy missile is unnecessary.
Requires Missile Rack
Tracking Missiles
1,200 creditsAdds missiles that steer toward a locked evasive target.
Use it: Establish a target lock before firing this loadout.
Requires Missile Rack
Heavy Missiles
2,000 creditsAdds limited heavy missiles with a larger, harder-hitting blast.
Use it: Reserve scarce heavy rounds for high-value targets or dense clusters.
Requires Missile Rack
Breacher Mines
100 creditsAdds breacher mines designed to break armor and punish pursuit.
Use it: Lay them in the aft arc where a pursuer is likely to cross.
Requires Mine Layer
Blast Field Mines
1,800 creditsAdds mines with a wider blast area for groups and defensive positions.
Use it: Favor lanes where several threats may pass through one detonation zone.
Requires Mine Layer
Disruptor Mines
900 creditsAdds mines that disrupt enemy control systems when triggered.
Use it: Use them to interrupt a pursuer rather than only seeking direct damage.
Requires Mine Layer
Useful habits
Section titled “Useful habits”- Ask Flight to hold a firing angle before spending a scarce missile or charging a precise shot.
- Switch from general-purpose pulse fire to hull-focused ammunition after shields are down.
- Watch heat and ammo after each burst; firing faster is not always the best way to keep pressure on a target.
Station challenge: Target Range
Section titled “Station challenge: Target Range”The ship advances through fixed lanes while enemy ships cross its path. The targets do not fire back. They start with half of their normal shields and hull, so the range emphasizes target selection, firing timing, and rack handling. The run ends when the ship reaches the top of the course and scores how many enemy ships you destroyed.
Practice goal: acquire crossing targets early, choose a suitable rack, and spend the brief moments when a target is inside the firing arc.